Managing Alerts
General Use Rules
Designated Commonwealth employees may publish Alerts to their Agency website.
Things to Know:
-
Alerts will be published based on the date and time designated by you and will appear on the Agency website homepage
-
The alert will display on the homepage until it has expired
-
An
alert can be a link to an external site if you choose to enter a URL
-
Visitors can close the Alert dialog on the homepage by selecting the 'Close' option in the upper right corner of the alert box; however, the alert dialog will reappear upon refresh of browser
Alert Severity levels are:
-
HIGH – Red bar
-
MEDIUM – Green bar
-
LOW – Blue bar
Adding Alerts
Access Alerts System
-
Visit the URL below, including your agency's designated abbreviation in the underlined section of the URL.
https://auth-app.pa.egov.com/sites/alerts/Lists/AGENCY/AllItems.aspx -
OR go to your authoring website and under the gear you will see an "Add an Alert" this will take you to the alerts list
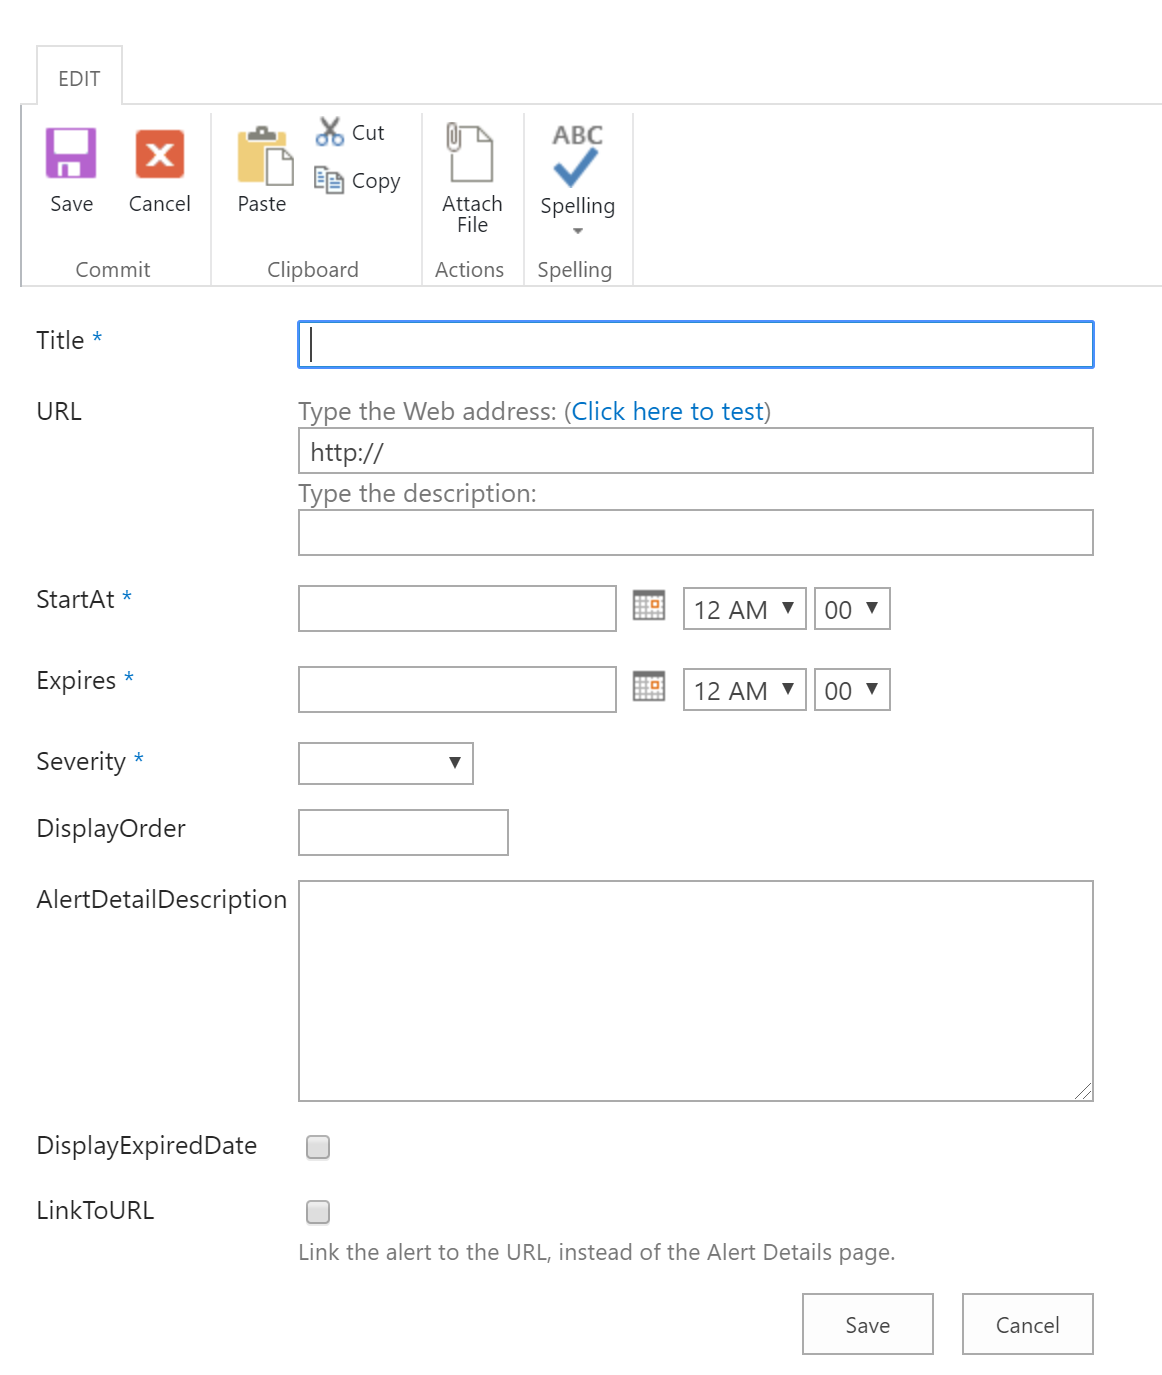
Add an Alert
- Select 'Add New Item'
- Complete the following fields in the pop up window:
- Title - Title of the alert that displays on the homepage
- URL - (optional) If you have an external site you that contains more details of the alert, you may enter that URL here
- You may also type the description in the field below it; however, it will not be displayed to the user
- Start At - Date and time you want the alert bar to display on the homepage
- Expires - Date and time you no longer want the alert bar to display on the homepage
- Severity - Drop down menu with High, Medium, Low options and will determine the color of the alert severity - Drop down menu with High, Medium, Low options and will determine the color of the alert bar
- Display Order - If multiple alerts are set display at once, you can set the order the alerts will display. This only works on alerts with the same severity
- Alert Description - You can enter additional details for the alert which will show on the 'More Details' page when this option is selected (this can be HTML code for links and formatting)
- Display Expired Date on Alert Banner - Select if you want the alert banner to show a viewer the time when the alert will expire
- Link to URL - Allows users to give a direct link to the URL given above and bypass the Alert Details page (new April 2020)
- If there is an already existing alert, please delete and replace with a new one
- Make sure the page your are directing the link to is already published and live in production prior to adding the alert (alerts are not effected by content deployment)
- Select 'Save'
- Reload your agency website and the alert will be displayed
- To check the description, select the alert bar. You will be directed to the 'Alerts Detail Page'
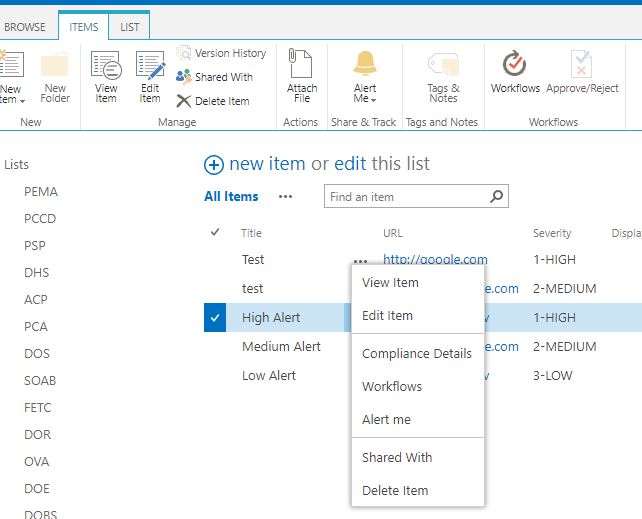
Edit Alert
- Select ‘Site Actions’ menu in the upper left corner
-
Select 'Add an Alert' from the menu, login to the agency alert list page when prompted
-
By default your agency list should be selected. Navigate to the alert you would like to edit
-
Choose 'Edit item'
- Modify the desired fields
- Select 'Save'
Delete Alert
- Locate your ‘Site Actions’ menu from the upper left corner and select ‘View All Site Content’
-
Select 'Add an Alert' from the menu, login to the agency alert list page when prompted
-
By default your agency list should be selected. Navigate to the alert you would like to edit
-
Select the check box to the left of the Alert item name
-
Choose 'Delete item' from the ribbon or by selecting the drop down menu to the right of the item name
-
Select 'OK' when prompted to verify delete and send to the Recycle Bin.